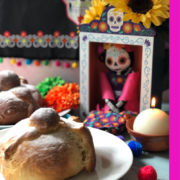
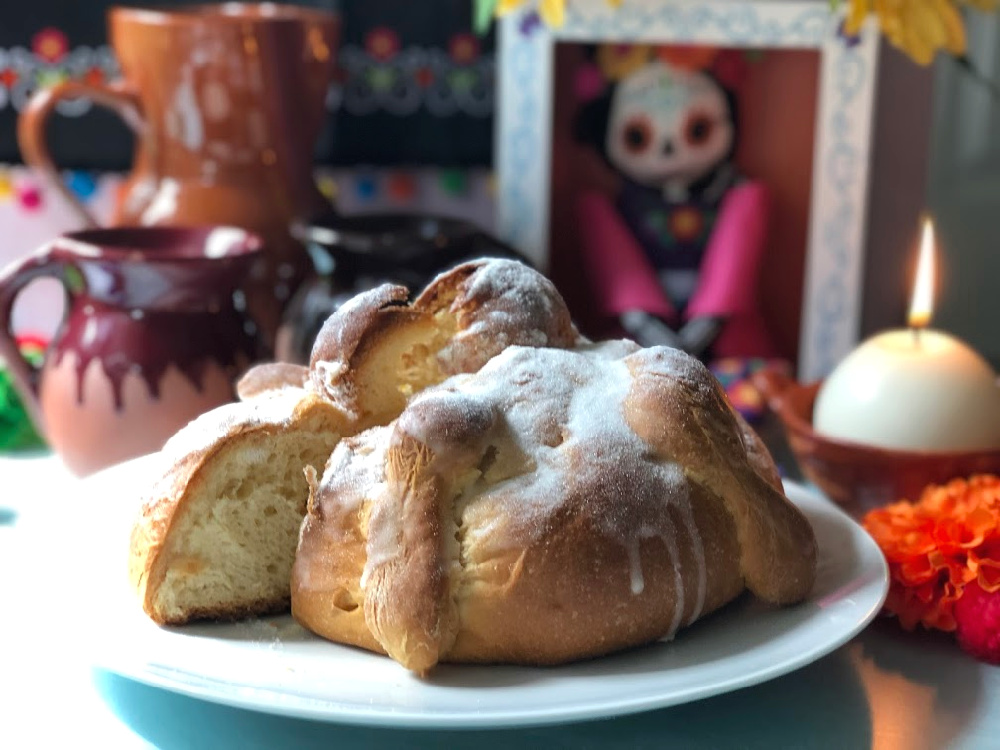
We made Mexican bread for Day of the Dead and it is delicious!
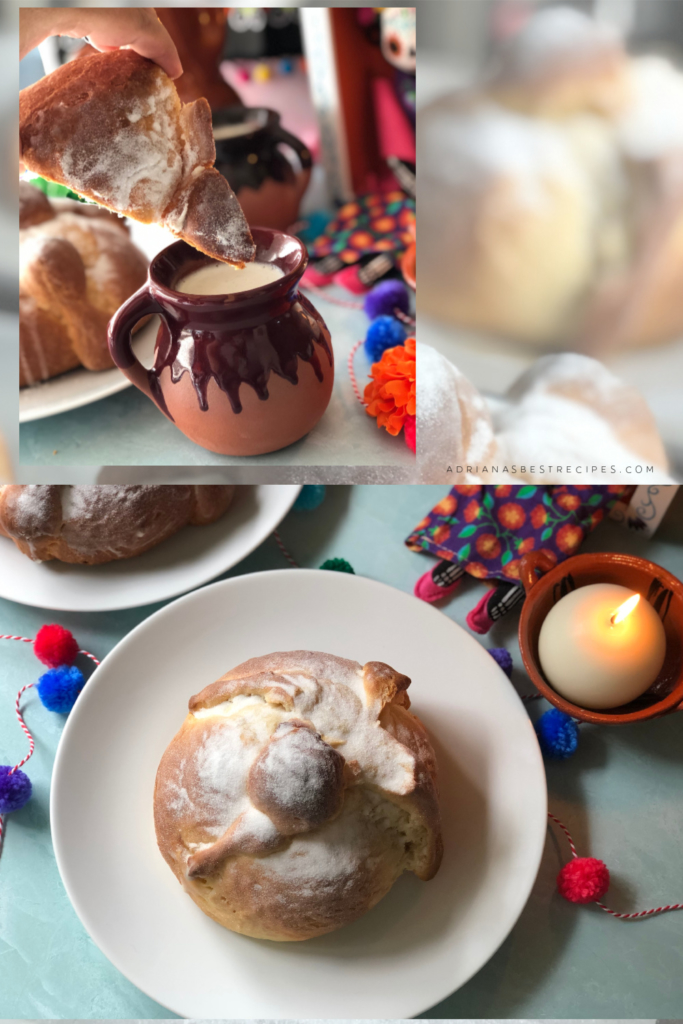
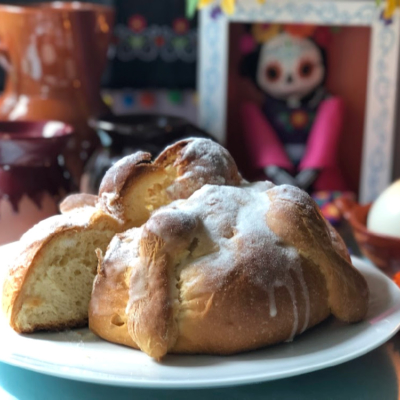
This bread is sweet and aromatic. It has hints of orange and orange blossom water. It is soft and perfect to enjoy with atole de mazapán or with a frothy Mexican hot chocolate. Once you have the first slice you will crave another piece.
Many call this aromatic bread the Mexican brioche as it has eggs and the texture and softness simulates a French brioche bread but it is not. Mexican baked goods came about due to the Spaniard heritage after the conquest.
The Spaniards, aside from bringing Christianism they also brought wheat and the bread-making tradition which was unexistent. The main crop produced and consumed by the people at the Great Tenochtitlan was corn.
A brief history of the Mexican bread for Day of the Dead.
Gifting sweet bread on the Day of the Dead symbolizes a fraternal offering to the souls. Thus having aromatic sweet bread on the altar offering is a very important element.
There are different types of Mexican bread, depending on the region is the type of bread prepared by the skillful bakers in the country. For instance, in Oaxaca, the bread has sesame and anise seeds, and it is called “pan de huevo”. And they also make little human-like figurines with colorful marzipan heads and decorations.
This was my first time making Mexican bread at home. And now I can say I am hooked in the breadmaking!
I grew up in Mexico City and the tradition of the bread is different from the south. Bakeries sell and prepare the recipe brought by the Basques in the 1940s. Thus this is the recipe that I followed making a soft round Mexican bread with bones on top resembling the human remains and dusted with sugar.
It is intimidating making bread, however, using the correct measurements and technique both are key for a successful result. Before venturing into the world of breadmaking I did some research and even used old Mexican bakery books to get more insights on how to make the best Mexican bread.

I used good quality ingredients too. This is very important as the ingredients used can determine good or bad results when baking this Mexican bread. Using yeast can be tricky. But I had the chance to attend a seminar and learned a lot from the folks are Red Star yeast. Which by the way this instant yeast is natural and user-friendly. You do not need to be a professional baker to use this product.
The type of flour I chose is perfect for the Mexican brioche, I used King Arthur all-purpose flour. Has enough protein and I have been to their mill and wheat farm in Kansas. It is good to know where the ingredients that I use in my kitchen come from.
Mexican Bread for the Day of the Dead Feast
Equipment
- Stand Mixer
- Flour sifter
- measuring cups and spoons
- Plastic container with a sealing cover
- Zester
- Scrapper
- Plastic container with a cap for the yeast
- Thermometer
- Oven
- Baking sheets
- Pastry brush
- A beater and a dough hook for the blender
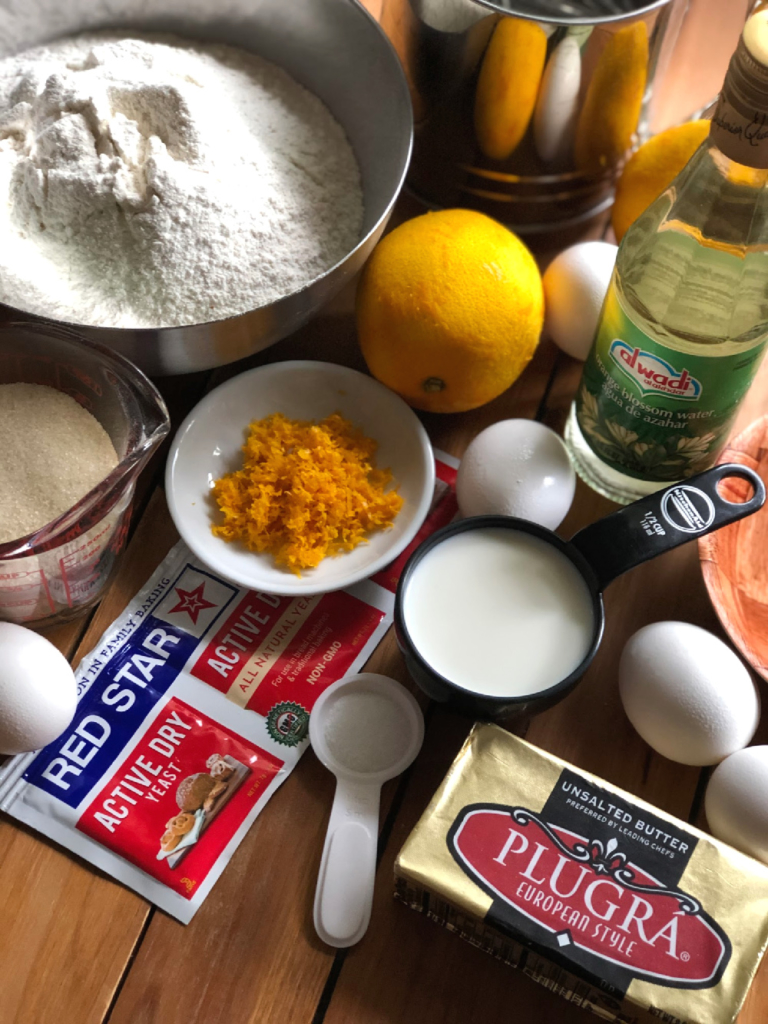
Ingredients
For the dough
- 3 cups all-purpose flour 360 grams and sifted recommend King Arthur brand
- 3 eggs room temperature
- 3 yolks room temperature
- 3/4 cup sugar granulated white sugar
- 3/4 teaspoon salt
- 3 teaspoons orange blossom water
- 2 tablespoons orange zest or the zest of 2 oranges
- 2/3 cup butter 150 grams and room temperature
For the yeast
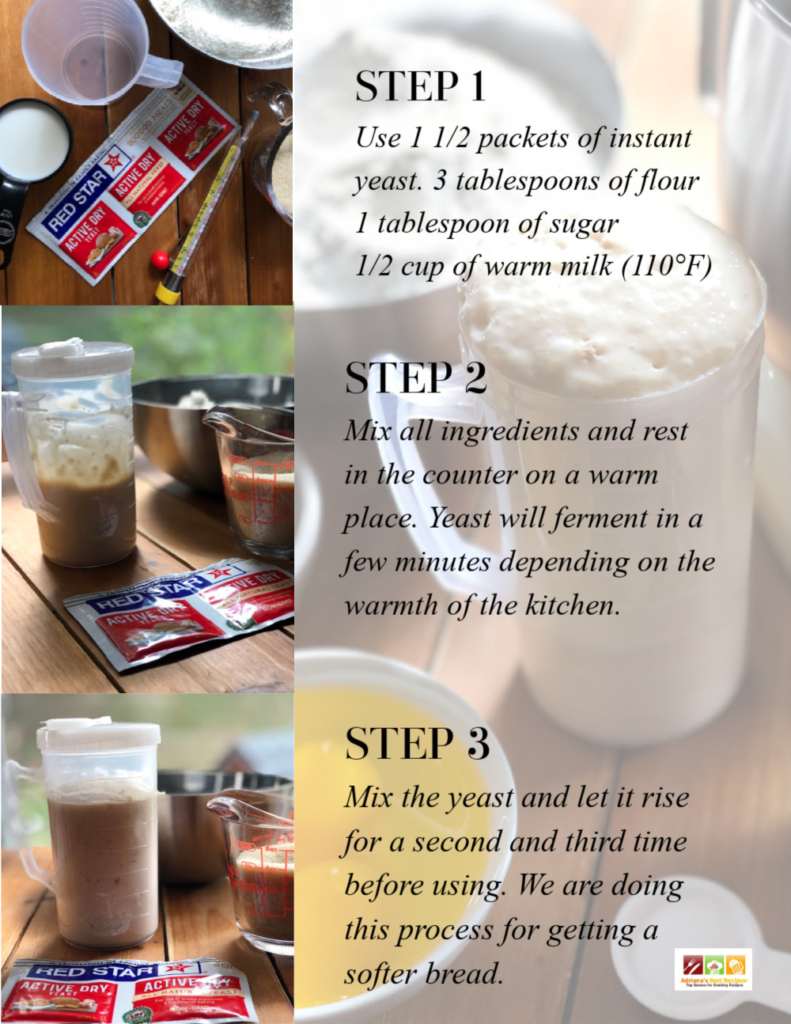
- 1 1/2 packets active yeast 11 grams and recommend Red Star active yeast
- 3 tablespoons all-purpose flour recommend King Arthur flour
- 1 tablespoon sugar
- 1/2 cup milk has to be at a temperature of 110°F-115°F
For the topping
- 1 cup caster sugar
- 1/2 cup butter melted
Instructions
- Start preparing the yeast combining the active dry yeast with flour, sugar and warm milk. Mix well, cover and let the yeast ferment for a few minutes in a warm area of the kitchen. When it doubles and starts bubbling is ready.
- Stir the yeast and let it rise again. You will do this three times. When the yeast is fermented add it to a bowl and combine with the eggs and the yolks using the stand mixer. The eggs and yolks have to be room temperature and added one by one.
- When the yeast and the eggs are blended, that is the time to start adding the sifted flour a spoon at a time. Then add to the mix the sugar and the salt. When all is integrated add the orange blossom water and the orange zest. Continue mixing.
- Remove the beater and insert the dough hook to the stand mixer. Continue mixing at medium speed and start adding the butter slowly. Knead on the machine for 20 minutes.
- Remove the dough from the mixing bowl. The dough will be sticky, so add some flour to the surface and knead by hand for the other 20 minutes. You can take your time and let the dough rest for a few minutes. This dough requires to be worked to develop the gluten and allow the bread to be soft and moist.
- When the dough doesn't stick to your fingers or the surface and when extended doesn't rip in the process, that is the signal the dough is ready for the next step.
- Make a round loaf and place it inside a plastic container with a lid. The container must be coated with oil to avoid sticking. Close the lid and let the dough rise on a warm area withing the kitchen.
- When the dough doubles remove from the container and punch. Add some flour and knead again. Form a round loaf and cut in four pieces. One of the pieces of dough cut again and use it for making the decorations.
- Take each piece of dough and form round four loaves making sure the seam of the bread goes on the bottom to allow each loaf to look perfectly round.
- Take the portion of the dough for the decorations and add flour. Work the dough until it achieves a playdoh texture. For making the bones, form a cylinder and roll forward first with one finger and then with two. The back and forth movement will help stretch and divide to make a bone shape. For making the top part of the skull just make a little ball with the dough.
- On the top of the loaf make a cross of water with the baking brush. This will help the decorations to stick. Add the bones and little ball to goes on top and let the bread rise again for about an hour. Bake in the oven at 350 degrees Fahrenheit for 15-30 minutes
- Test the temperature of the bread using a digital instant-read thermometer. Stick the thermometer's probe into the thickest part of the loaf, which is usually the middle. Wait a few seconds for the reading to appear. If the temperature reads between 190 and 210 degrees, the bread is done.
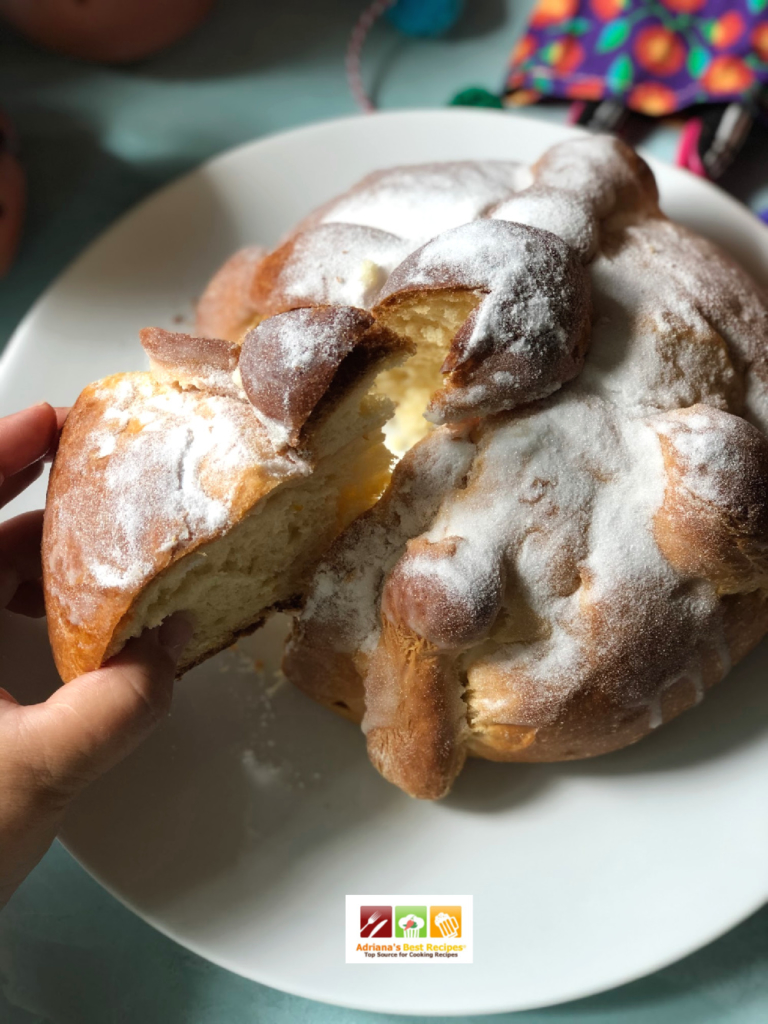
- Place on a rack to cool and brush the bread with melted butter. Sprinkle the bread with caster sugar and enjoy.
Video
Notes
- The dough for the Mexican bread is sticky, do not be tempted to add more flour.
- Knead the dough enough and it will turn from sticky to soft and malleable.
- Let the yeast rise three times before using. This will allow the bread have a fine texture, same as brioche.
- If you prefer to bake the bread later, refrigerate the dough immediately after mixing, not after the first rise.
- When ready to bake remove the dough from fridge, shape, and rise before baking.
- This second rise can take anywhere from an hour to a few hours, depending on activity of yeast and the room temperature.
- Other way to check if the bread is has cooked is by giving to the bottom of the loaf a firm thump with your thumb. The bread will sound hollow when it’s done.
- Bread will last up to 5 days fresh when stored inside a plastic container with a lid. Will keep fresh up to three days when stored into a zipper plastic bag.
Have you tried this recipe? Snap a photo and tag us on Instagram and or Facebook using the handle @adrianasbestrecipes and this hashtag #ABRecipes Happy Eats!
Nutrition

- Tex-Mex Veal Fajitas with Melted Cheese - June 23, 2024
- Spicy Mango Pineapple Chutney Recipe - November 17, 2022
- Squash Blossom Quesadillas Recipe - November 10, 2022
